Many animators have a dream of one day starring in their own movies. With Toon Boom Studio, animating a picture of yourself or any other bitmap image is now possible.
Preparing the pictures
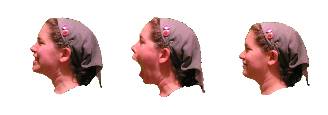
It all starts with that single click when you take a picture that you want to animate. The process is simple, as you take you picture try to figure out what kind of movements you’ll perform in your story. Take as many photos as you need. For example, if you wish to have a talking character, you can create different head expressions.
Once your pictures are taken, you have two choices:
- Importing the images directly to Toon Boom Studio
- Retouching them first. If you retouch them, remember to add an Alpha channel around the shapes before saving the files. When vectorized in Toon Boom Studio, the alpha channel will be cropped and your picture will be wrapped around a vector shape automatically for easy animation with the transform tool.
Importing the bitmap images in Toon Boom Studio
In previous versions, Toon Boom Studio only gave you the option of importing and vectorizing images. you can also choose the style of this vectorization.
- In the Exposure Sheet or the Timeline, create a new drawing element for each body part you need (For Example: head, body, mouth…)
- Select the first frame of an element, right click and choose the option Import and Vectorize > From File Two windows appear.
- First, browse to find the image you want to import
- Once this is done, locate the Vectorization Type section and select the option With Texture.
This new feature will allow you to retouch imported bitmap images using the Toon Boom Studio drawing tools.
Editing your images directly in Toon Boom Studio
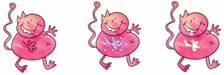
Once your bitmap images are imported, you can now modify them. In this example, we loaded a textured cat.
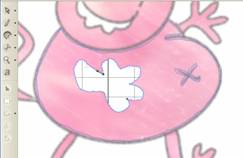
- Using the scissor tool, we removed the right arm of the character. By default, the tool works with a bounding box, but pressing [ALT] will transform it to a lasso scissor. Note that you could also use the cutter tool.
- After you circle the part, cut and paste it on another element level.
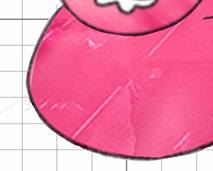
- Go back and take a look at the initial image, you’ll see a hole in the middle of your body left by the removed arm. You will need to fill this hole.
- In the color palette, create a textured color.
- Right click in a color pot, then, select Color > Add Texture.
- Browse to find the same texture used to create the character. Paint the zone with this color. Also paint the hole left when you removed the arm.
Continue the process of copy/pasting other body parts element per element. A little trick: the less body parts you have overlapping each other, the fastest will be the process. This prevents you from having gaps to fill up.
Animating your character
Once all your parts are placed on separated elements, you’ll now have to set the pivot points. Use the rotate tool and move the green circle where you want the rotation to take place. If you wish, you may connect all your elements to a Master Peg. But it is not necessary to add Pegs to all elements since Toon Boom Studio allow you to create keyframes directly in an element layer.
Animating a character made from pictures is not different from moving vector body parts drawn directly in the software.
Animate faster
Of course, bitmap images are heavier than vectors. Depending of the number and the size of the files you import, you may have to deal with some performance issues.
A trick to help you is to go to the Preferences > Display and unselect the Smooth Texture and Bitmaps option. This option only affects real time preview meaning the bitmap images will appear to be more pixilated inside the camera view of Toon Boom Studio but the end result will be the same quality.
Leave a Reply